Night photography: stars, aurora, and the Moon need different approaches
Learn why a dark sky does not call for one universal exposure, with examples of the Milky Way, northern lights, and lunar detail.
 View this photograph & print options →
Night photography begins by identifying what you are trying to record. Faint stars, moving aurora and the sunlit surface of the Moon differ enormously in brightness and movement. Copying one set of settings across all three is unlikely to work. The photographs here illustrate different visual goals; the suggestions below are starting methods, not the settings used to make these particular images.
Stars: balance collected light with movement
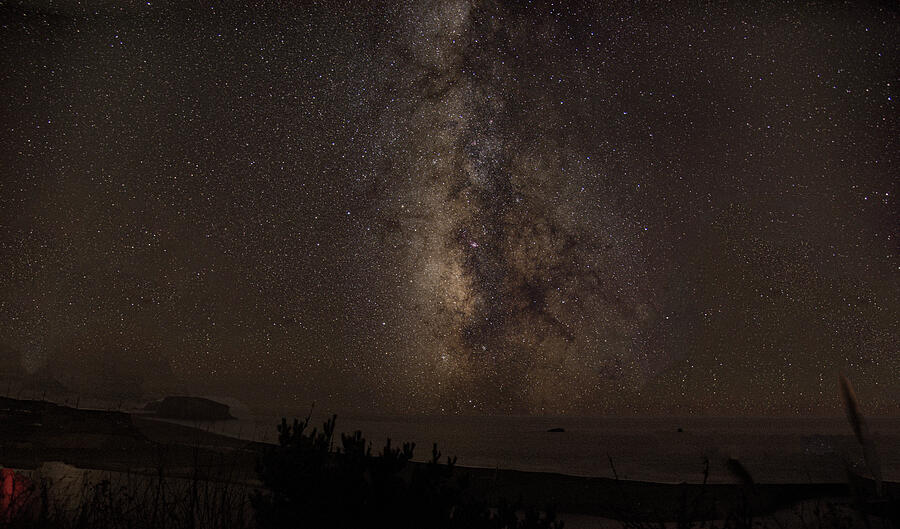
Milky Way Over Tranquil Shoreline combines a star-filled sky with a recognizable foreground. The shoreline gives the sky a setting. When planning a similar composition, identify a foreground while you can still see it clearly, then decide how much of the image the sky should occupy.
Use a stable support and focus carefully on a bright star with a magnified preview when your camera allows it. Check the captured image at high magnification. A longer exposure gathers more light, but Earth’s rotation can stretch stars into trails. The useful exposure time depends on focal length, camera resolution and how large you will display the result. Shorten it if star shape matters and you can see unwanted movement. Choose aperture and ISO by testing the tradeoff between brightness, lens performance and noise.
Aurora: preserve motion when it matters
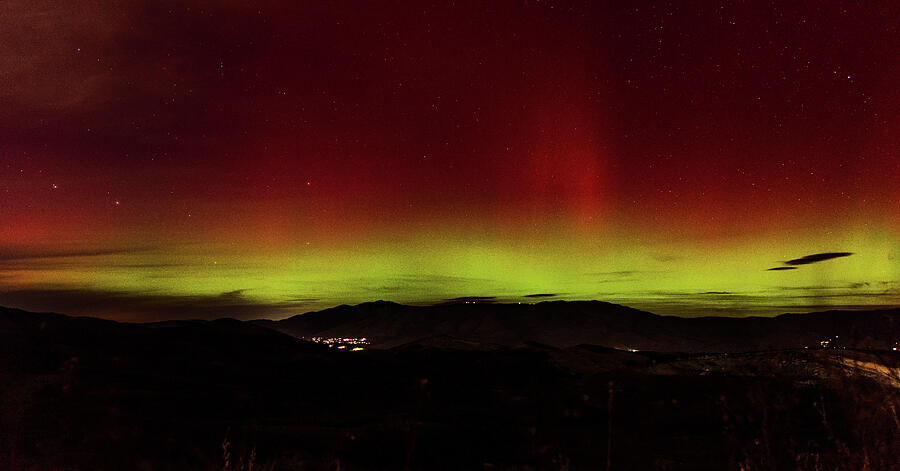
Northern Lights Over Wasatch Mountain Range shows bands of colored light above a dark mountain outline. Aurora can change shape and brightness while you expose. A longer exposure may smooth those structures together; a shorter exposure may retain more definition when the display is bright enough.
Review frequently rather than treating the first successful exposure as a fixed recipe. If the light brightens, reduce exposure before the colors or bright bands lose detail. If the structure becomes a soft wash and that is not your intention, try a shorter shutter time and reassess aperture or ISO. Keep a recognizable horizon when it adds context, but do not let a large empty foreground crowd out the display.
The Moon: expose for the subject, not the darkness
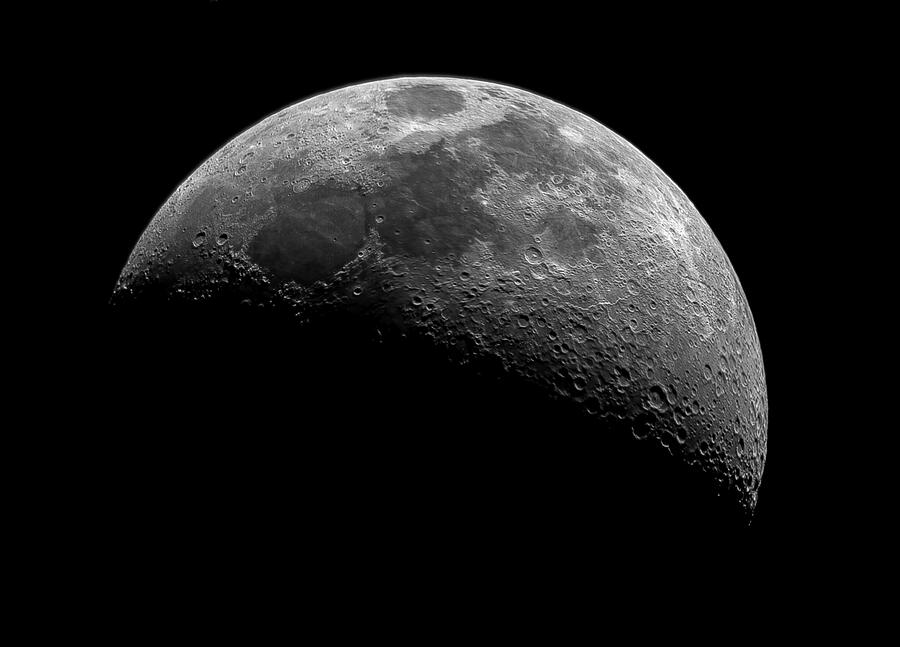
Illuminated Half of the Moon reveals craters and surface texture against black space. The boundary between light and shadow makes the relief especially visible. This is a different task from collecting faint starlight: the illuminated lunar surface is bright even though the surroundings are dark.
If automatic exposure produces a featureless white Moon, reduce it and inspect the bright surface. A longer focal length can make lunar detail larger in the frame, but also magnifies camera shake and makes precise focus more important. Use a stable support, refine focus on visible detail, and select an exposure that avoids motion blur and clipped highlights. Let the background stay dark rather than exposing it as though it were the main subject.
A repeatable review routine
After each test frame, check three things: focus, movement and highlights. Are the stars the shape you want? Has the aurora retained useful structure? Is the Moon’s bright surface still textured? Change one variable at a time so you know what improved the result. When possible, capture RAW files for more editing flexibility, while remembering that editing cannot restore badly missed focus or fully clipped detail.
For practice, work on one kind of night subject per session. Make a short series that changes shutter time while holding your composition steady, then compare the effect on sharpness and texture. Once you understand that relationship, adjust the other settings. Aim for a clear visual intention rather than a single “correct” night-photography recipe.